Thursday, December 20, 2012

Digifab-ulous Project 3: Car Ornament

The final project for Digifab-ulous was to create a car hood ornament. I am dedicating this ornament for my brother Tom, who's very talented in music/signing/recording. As you wish I hope you will reach 10,000 subscribers on YouTube; I know you're close!

From Rhino program I have rendered some elements that are inspired by music that both myself and brother are very passionate about: the DJ turntable is wearing a tilted crown with gem embellishments on its head, laurel wreath stemming from the center to represent victory as the loud bass speakers are protruding on each sides.

This rendered model will be printed as ABS Plastic from SDSU furniture department. First what is ABS Plastic? Here's a quick presentation that I created for the class, enjoy~
I have rendered a portion of the DJ turntable, the crown, along with the un-warped bass speaker that is shown on the background.
The gems on the crown is rendered, soon I will create small prong posts to hold each gems. The laurel wreath stem is rendered. DJ turntable has a separate bottom plate, the disc and its center post. There will be  lettering of "TOM" engraved on the back of the turntable.
On Rhino there are four panels to show different views but you can have more: Top, Bottom, Right, and Perspective. As I have started to bend/distort/stretch the bass speakers, we found some problems. The command to bent/stretch made these speaker objects "open," where I had to re-render them as "closed" objects. In order to print successfully an object cannot be hallow/ have voids/ or be one dimensional. If there's an opening the object will start to create unwanted planes...
You can see the various versions of the bass speakers, however this was good exercise to come up with desired shape and to make sure each objects were "closed." The laurel wreath is now 3D; the stem and leaves were rendered separate but later joined as one object.
On the bottom right image you can see the side profile of the object. At this stage I am still re-rendering bass speakers, distort/bend/stretching them to desired shape.
Then I decided to create some diamonds that will be spreaded around the post of this car ornament.
As I thought I was finished, again I found out that some of the speakers  were "open" so I went back and re-render them.
Ta-da! This is the final version of the car ornament:
You can see the diamonds on the bottom plate
Detailed view of the crown, gems and prongs
Back view: Engraving and support beams
I am pretty thrilled to see how it will turn out. I know that ABS plastic surface is pretty rough and I am little worried that this ornament is going to be only 6 inches wide. As a test model ABS plastic would be fine, perhaps I can always print it in a different material/format for quality surface.

To be continued folks! See you again in couple days!

Saturday, December 1, 2012

Digifab-ulous Project 2: Gem Table

The concept of the gem table has prong setting-like table legs that hold the gem table top in place. The table top design is fun with an overlapped silhouette of different gem cuts. It will become a small-sized coffee table. The material is 0.75 thick plywood that we will be cutting with SDSU's CNC machine. 

Lay out of gem table top 
Prong setting references
Lay out of each pieces. Gem table, prong setting legs,
middle bridge of prong setting + bottom plate
CNC machine cutting the sample joinery of the table
before we cut the actual furniture pieces
 Exciting CNC machine in action!
Cleaning out the debris
Ta-da! Table joinery sample assembled!

After hammering down each pieces I realized that the visible corner cuts were too visible. Therefore, I modified the orientation of the corner cuts so when they are fitted together the joinery area is more invisible. I am planning to cut out my gem table pieces next week. I can't wait to upload photos of the final piece! To be continued ;)

Thursday, November 29, 2012

NC Black @ SDSU

It's been 2 years since I've seen Andrea! I've been to NC Black's micro-forming/ engraving workshop back in my undergraduate at Studio Delucca, Long Beach, CA. It was a great workshop to learn microforming/anticlastic/syclastic/micro spiculum & hammer engraving.
Visit NC Black for more info. In the span of last two years their hammer & block selection has expanded. (One hammer is now named Angelina, my buddy who works with Schmidt studio!).
Here are some photos from the workshop, enjoy :)

Andrea making micro spiculum
Various samples
I love their tiny-well made hammers <3
Andrea closing the spiculum form with a tiny closing hammer
I got to see the finger spiculum
that Angelina made for Rihanna's music video!
Thank you Andrea & Chuck from NC Black!

Again thank you for visiting SDSU :)

Sunday, November 25, 2012

Digifab-ulous Project 1: Spirit Animal - Jellyfish

Digital Fabrication class 1st Project: Spirit Animals

This semester I am taking Digital Fabrication class to learn how to use Rhino program, use CNC machine and ABS plastic printer.


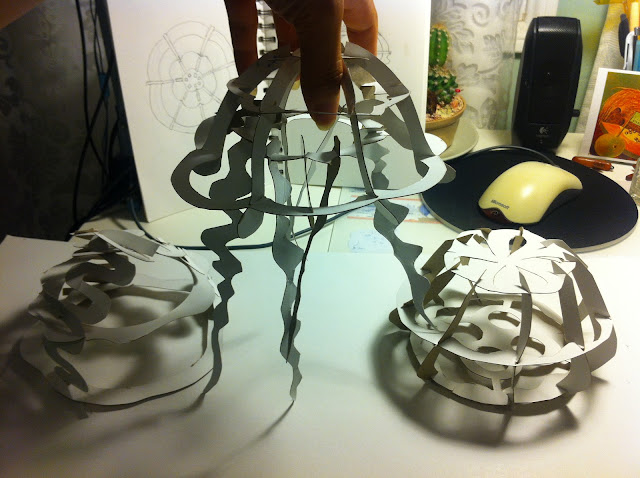
Our first project is utilizing laser printer, we will be using Rhino program to create our spirit animal. Then we will be sending our files to local printing shop to get our puzzle pieces cut. My spirit animal is Jellyfish!

Making paper models
Scanning paper model pieces to start rendering on Rhino 


Figuring out if the distance of the nail head will fit wit slot distance
Rendered pattern on with different layers
Fitting the puzzle pieces virtually in 3D
We are excited to get our spirit animals back soon! They will be delivered to us this week, I'm so excited!

Sunday, November 18, 2012

in/tangibles setup

Personal Map, Restricted-Bound, Restrain
SDSU metals crew installing


Metals + Furniture
Personal Map 2011


Restrain 2012
Love this photo of us~
SDSU metal + jewelry crew @ in/tangible opening


Thanks for those who came and supported
SDSU'S metals + furniture crew!

Friday, November 9, 2012

Restrain


Neckpiece: Restrain 2012
Hanji paper, steel, brass, hemp cords
20 x 9 x 5"
Photo: Seth Papac
Detailed view

Friday, November 2, 2012

Transmission

Neckpiece: Transmission 2012
Hanji paper, copper, steel, graphite
22 x 9 x 5"
Photo: Seth Papac
Chased and repoussed metal form on the center + casted paper pods


Friday, October 26, 2012

Convergence

Brooch: Convergence 2012
Hanji paper, copper, paint
3 1/2 x 4 x 2"
Photo: Seth Papac
I began to incorporate Hanji paper (traditional Korean paper, mulberry) in my work. The juxtaposition of paper and metal expresses the duality of hard and soft, permanent and ethereal. The back of the brooch reveals feathered edge of the paper, and various sized hammer textures on the raised body with pin mechanism. The front reveals the fibrous threads of the paper that has been applied to the metal where another form is conjoined to create another space in the center.

Sunday, October 21, 2012

Borders

Borders (North and South Korea) 2011 
Borders (India and Pakistan) 2011
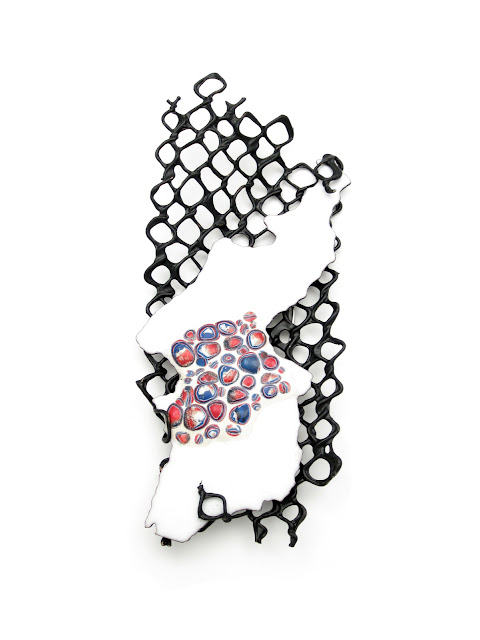
I have picked two neighboring countries that are in conflict; first one is North and South Korea, the second piece is India and Pakistan. By combining each regions with their capital city, a new outline of a country is born as the enamel colors are combination of each country's flag colors. 

Wednesday, October 17, 2012

in/tangibles opening

in/tangibles
SDSU's Jewelry and Metalworking + Furniture Design Woodworking show

Southwestern College

900 Otay Lakes Rd.
Chula Vista, CA 91910

Opening Receptions

Thursday, Oct 18, 2012
6-8 PM

This exhibition will run from:
Oct 18 - Nov 13

Art Gallery Hours
Tues - Thurs 10:30 am - 2 pm
Wed + Thurs 5:30 pm - 8 pm

Free parking in Lot J for evening reception
This even is free and open to the community
Say Hello to SDSU's Jewelry + Metal's bunch!
Hustlin' my crew~
More photos to come ;)