The final project for Digifab-ulous was to create a car hood ornament. I am dedicating this ornament for my brother Tom, who's very talented in music/signing/recording. As you wish I hope you will reach 10,000 subscribers on YouTube; I know you're close!
From Rhino program I have rendered some elements that are inspired by music that both myself and brother are very passionate about: the DJ turntable is wearing a tilted crown with gem embellishments on its head, laurel wreath stemming from the center to represent victory as the loud bass speakers are protruding on each sides.
This rendered model will be printed as ABS Plastic from SDSU furniture department. First what is ABS Plastic? Here's a quick presentation that I created for the class, enjoy~
I have rendered a portion of the DJ turntable, the crown, along with the un-warped bass speaker that is shown on the background.
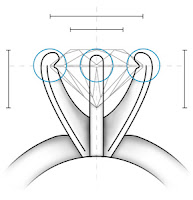
The gems on the crown is rendered, soon I will create small prong posts to hold each gems. The laurel wreath stem is rendered. DJ turntable has a separate bottom plate, the disc and its center post. There will be lettering of "TOM" engraved on the back of the turntable.
On Rhino there are four panels to show different views but you can have more: Top, Bottom, Right, and Perspective. As I have started to bend/distort/stretch the bass speakers, we found some problems. The command to bent/stretch made these speaker objects "open," where I had to re-render them as "closed" objects. In order to print successfully an object cannot be hallow/ have voids/ or be one dimensional. If there's an opening the object will start to create unwanted planes...
You can see the various versions of the bass speakers, however this was good exercise to come up with desired shape and to make sure each objects were "closed." The laurel wreath is now 3D; the stem and leaves were rendered separate but later joined as one object.
On the bottom right image you can see the side profile of the object. At this stage I am still re-rendering bass speakers, distort/bend/stretching them to desired shape.
Then I decided to create some diamonds that will be spreaded around the post of this car ornament.
As I thought I was finished, again I found out that some of the speakers were "open" so I went back and re-render them.
Ta-da! This is the final version of the car ornament:
 |
| You can see the diamonds on the bottom plate |
 |
| Detailed view of the crown, gems and prongs |
 |
| Back view: Engraving and support beams |
I am pretty thrilled to see how it will turn out. I know that ABS plastic surface is pretty rough and I am little worried that this ornament is going to be only 6 inches wide. As a test model ABS plastic would be fine, perhaps I can always print it in a different material/format for quality surface.
To be continued folks! See you again in couple days!


